Fifth Wheel Renovation
Our First RV
For our very first RV, we purchased a 2015 Keystone Alpine 3620FL and immediately moved in. Over the course of 4 months we completely renovated the entire interior to make it beautiful, functional, and perfect for full-time living. This included:
- Painting all of the walls and trim
- Upgrading storage spaces in the kitchen and bedroom
- Building a custom couch with additional storage (and sleeping space for one)
- Creating two work-from-home desk spaces
- Updating the kitchen and bathroom faucets and all door & cabinet hardware throughout the RV
- Updating the bathroom storage to make it more beautiful and functional
- Replacing the microwave/convection oven, tankless water heater, and front AC unit
- And more!
Below are some of our favorite before and after comparisons.
Disclosure: Some of the links below are affiliate links, meaning, at no additional cost to you, I will earn a commission if you click through and make a purchase.
Kitchen
Before
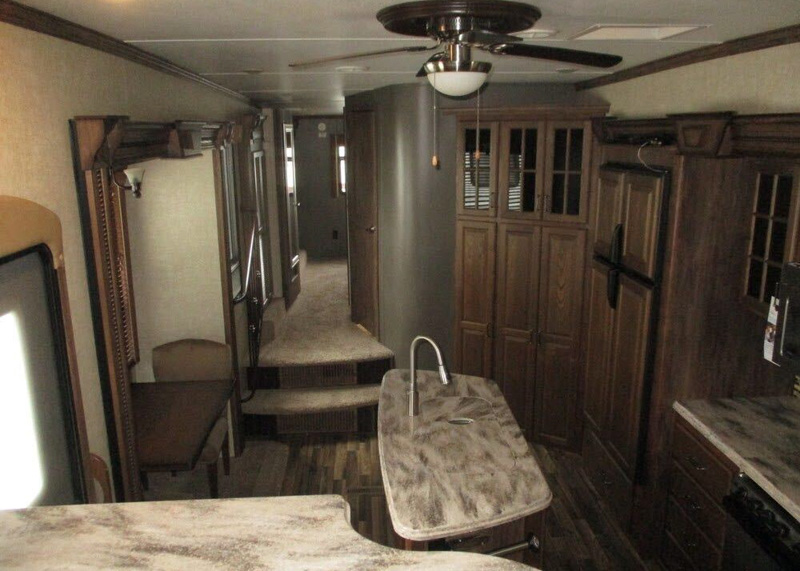
Looking at the kitchen from the front living room/office space.
After
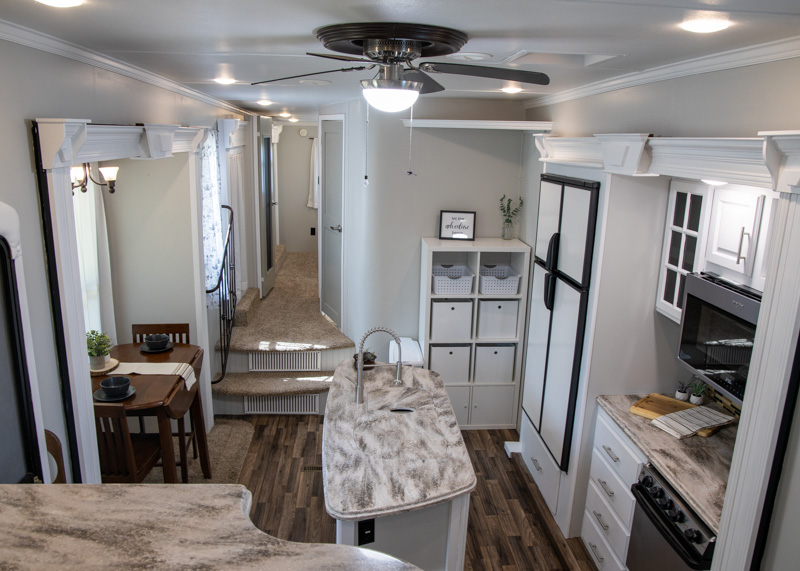
We painted the trim and the walls. We also replaced the awkward triangular pantry with a more functional pantry. To brighten the space even further, we replaced the dark refrigerator door panels with white markerboard panels.
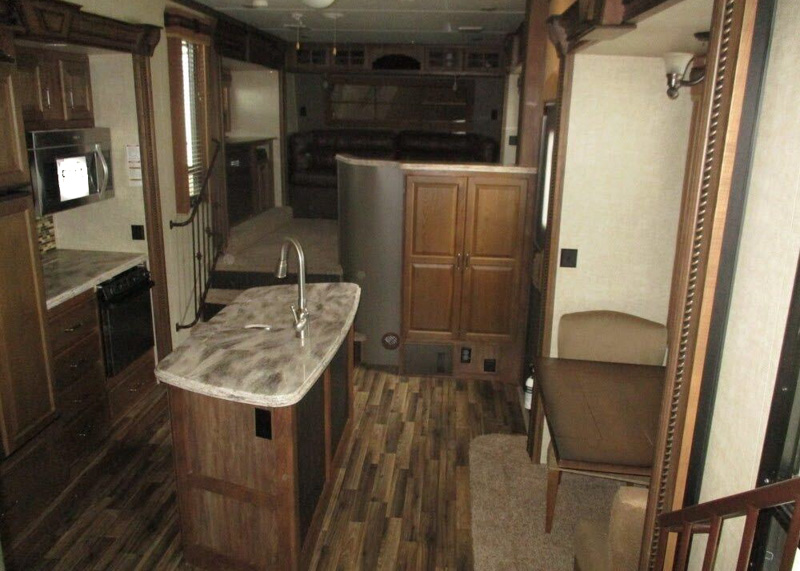
The original design made use of dark gray accent walls, which only served to make the space feel like a dark cave.
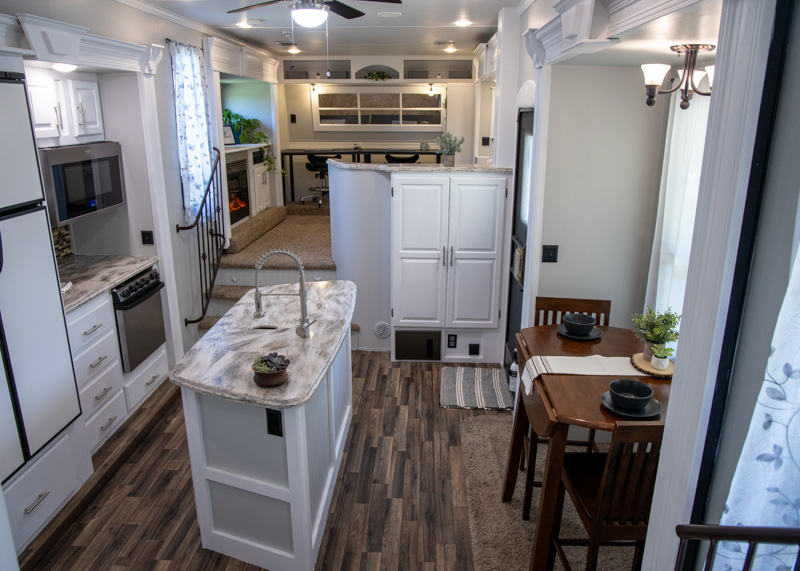
We painted the walls a light gray color and the trim a bright white. We also ugraded to a brand new, top-of-the-line Whirlpool microwave/convection oven.
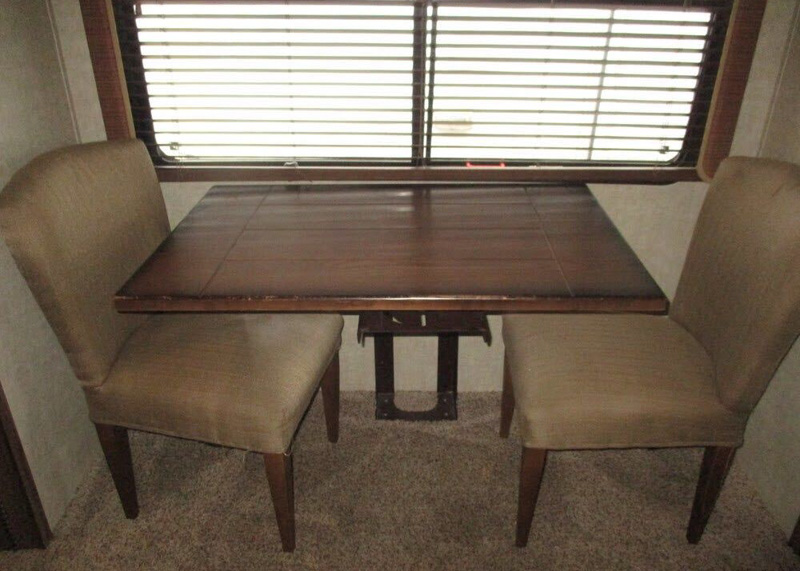
The original table was wobbly and cumbersome. The chairs were well-worn and badly stained.
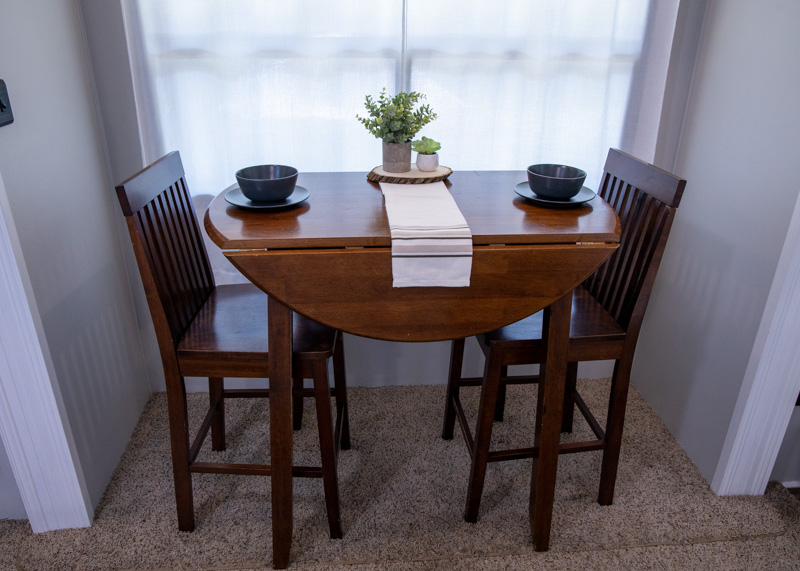
We removed the original furniture and replaced it with this bar-height table. We wanted something that felt comfortable for two people and also expanded to allow room for board games and puzzles.
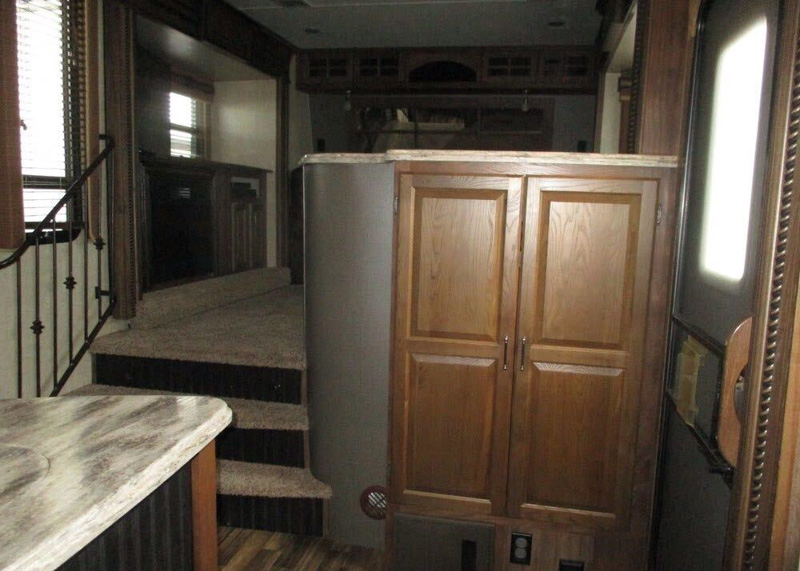
The dark wood trim and accent dark gray walls in the original unit made the space feel smaller and depressing.
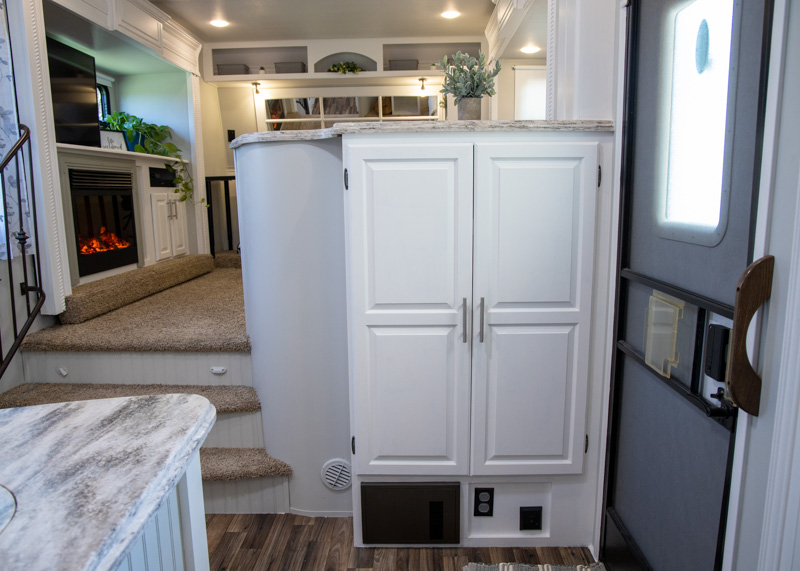
We painted all of the wood trim, which made the space feel brighter and more open.
Living Room
Before

The original couch was peeling and showed signs of wear. The large window valences cut into the space and blocked a lot of the natural light from coming in through the windows.
After
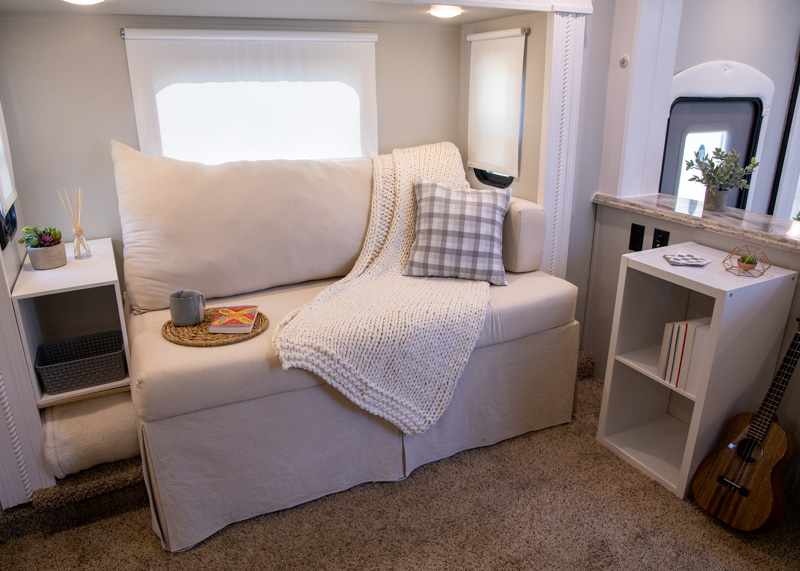
We built this couch, which converts to an extra bed for an overnight guest. We designed it to have ample storage underneath, and even cooler than all of that, it is made out of reclaimed materials from the original couches! We also replace all of the window treatments with roller shades and curtains, which provide privacy while still allowing natural light to fill the space.
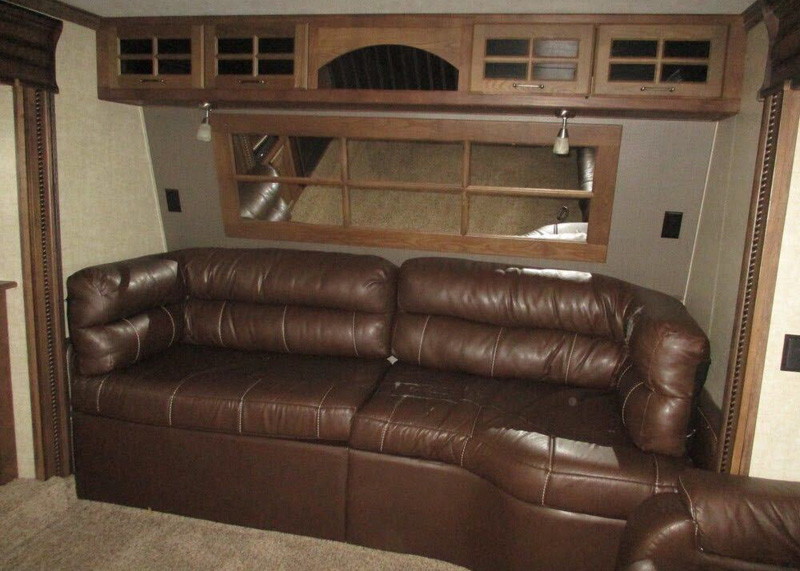
The original couch was peeling and showed signs of wear. The dark gray accent wall behind the couch just added to the heaviness that made the whole living room feel like a cave.
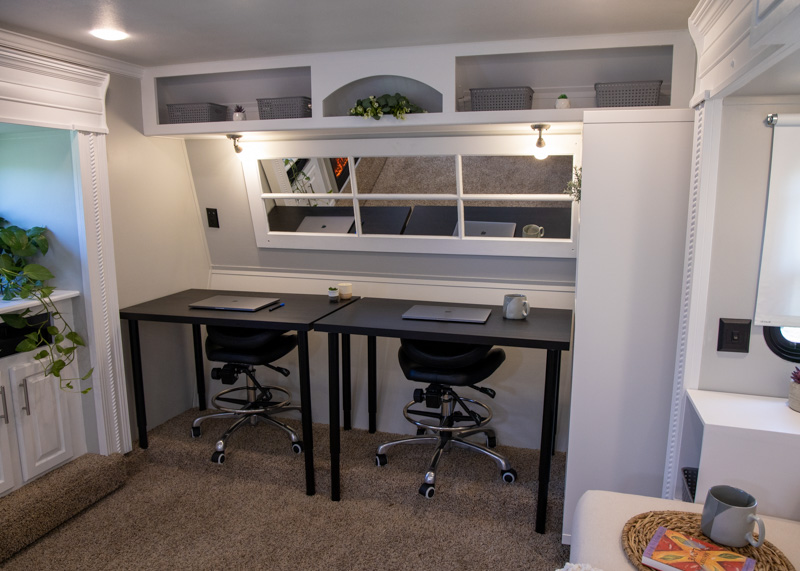
We removed the couch and replaced it with two fantastic work-from-home desk spaces. The desk chairs* tuck away at the end of the work day, making the space more functional for after work relaxing. The bookshelf adds additional storage and functionality to the space.
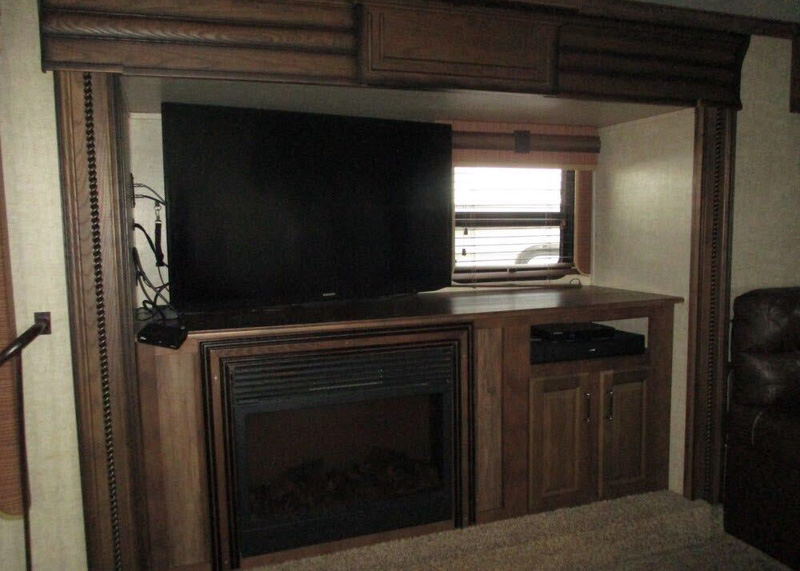
The entertainment center slide always felt dark and looming due to the overpowering wood finish color.
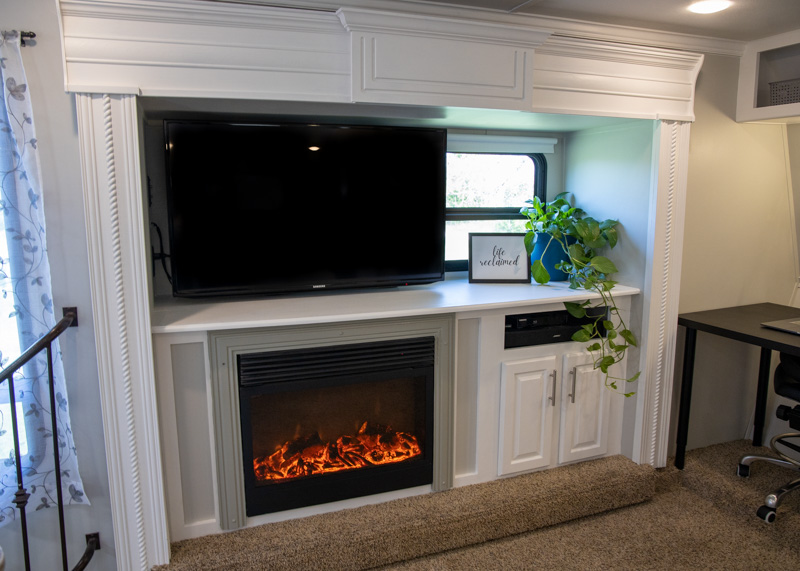
We painted the all the cabinetry and trim around the entertainment center to freshen up the space and replaced the overbearing valences with a simple roller shade.
Bedroom
Before
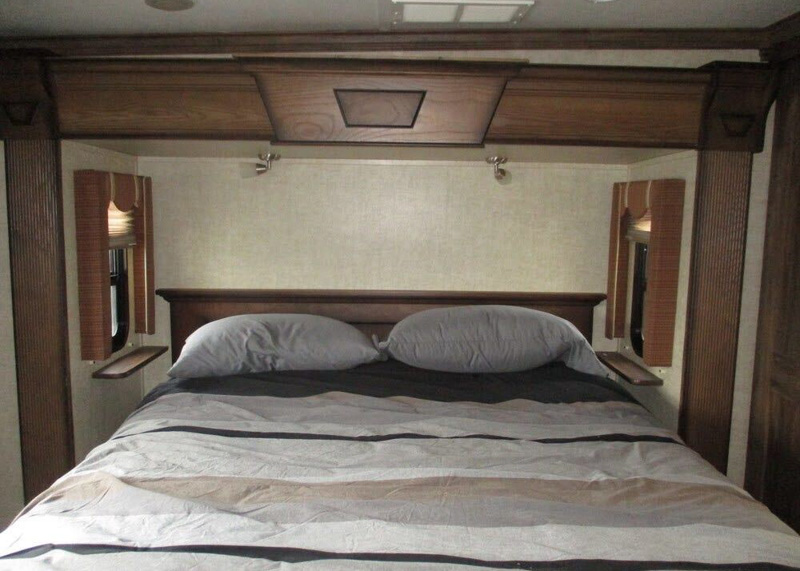
The bedroom also felt like a gloomy little cave thanks to the abundance of the dark wood trim and imposing window valences. Not to mention the colors on everything felt very “man-cave”.
After
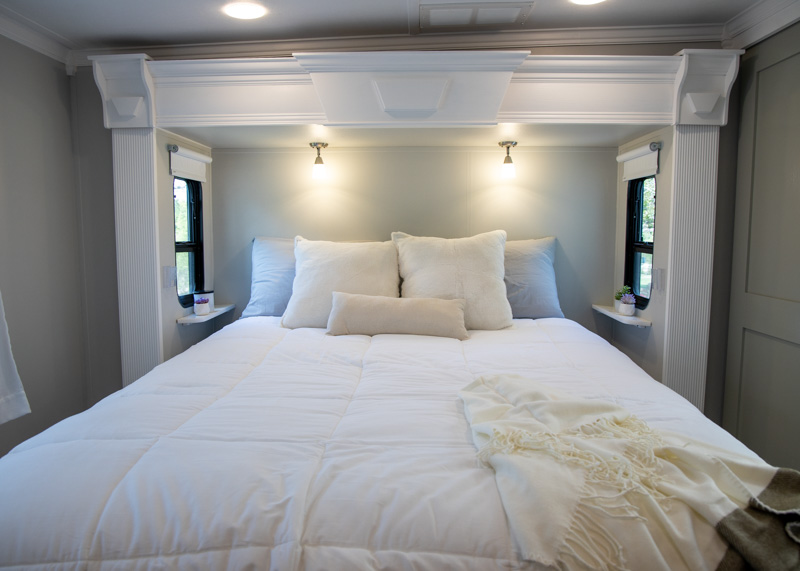
It’s amazing what a couple coats of primer and paint can do! I love how much lighter and more open the whole room looks now, especially with the updated window treatments.
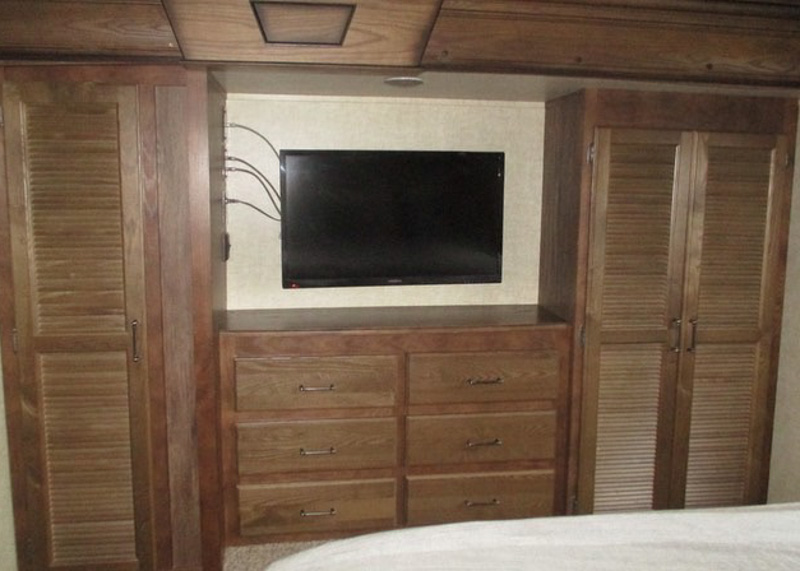
The original cabinetry in the bedroom was large, and unsuprizingly poorly designed. While they look big on the outside, the dresser drawers were barely half deep, with room for maybe two folded tshirts a piece!
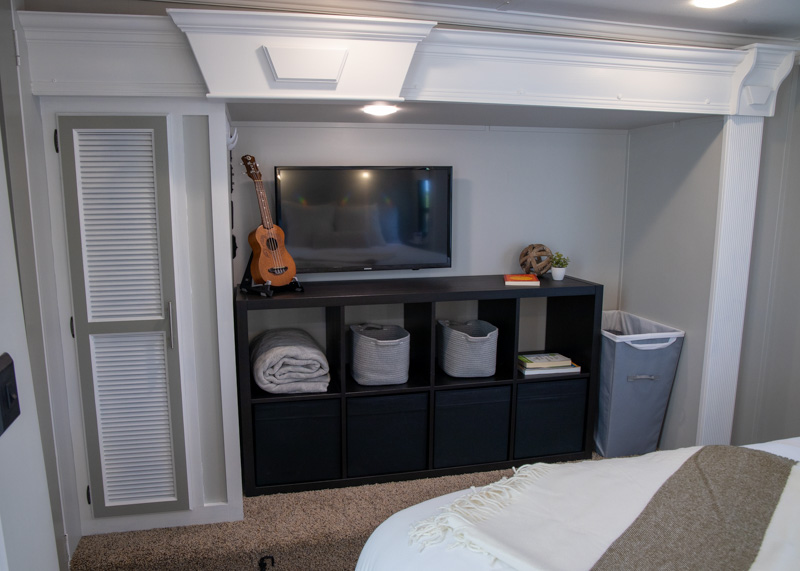
We removed the original dresser and one of the closets (with mostly unusuable space), and instead put in a very functional shelving unit with canvas drawers on the bottom. There’s now significantly more storage and the whole room feels bigger and brighter.
Want more?
To learn more about our renovation process including how-to videos, time-lapse videos, and our favorite tips and tricks, follow us on social media.