Travel Trailer Renovation
My Favorite Travel Trailer
The second time around, I chose something much smaller. The outside length was 27′ (including the trailer hitch), which means the interior “cabin” portion is a mere 24′ long. Over the course of about 3 month, I renovated the interior to make it beautiful, functional, and perfect for full-time living. This included:
- Painting all of the walls and trim
- Replacing the kitchen sink with a 9″ deep, stainless sink
- Replacing the countertops throughout with hickory countertops
- Installing whole-house water filtration and water softener systems to handle even the worst hard water
- Replacing the bulky microwave cabinet with more open shelving
- Removing the propane stovetop/oven to create much more storage space, utilizing an induction cooktop instead
- Building a custom couch with additional storage, allowing for a pull-out garbage/recycling unit and extra counters
- Updating the kitchen and bathroom faucets with high-end residential units
- Updating and increasing the bathroom storage spaces to make them more beautiful and functional
- Replaced the AC unit from a 13500 BTU unit to a 15000BTU unit, keeping us much cooler
- Installed JT Strongarm stabilizing bars around the base to practically eliminate all movement inside the rig
- And more!
Below are some of our favorite before and after comparisons.
Main Room
Before

After

I loved having the kitchen along the back end of this RV’s floorplan!
To make the space more pleasant for full-time living, I painted the trim and the walls to lighten up the space. I replaced the nearly unusable sink and faucet with high-end residential models, and and I produced my own hand-built hardwood countertops. I removed the microwave and stove/oven (and sold them on Craigslist to other RVer’s in need) to more than double our countertop space, and instead used an induction cooktop and a Ninja Foodi airfryer/oven/grill in their place. I added custom-made, snap-close panels over the spice rack and oven storage cabinet for ease on moving days.
BONUS: What you can’t see in this photo is the whole house water-filtration and softener system I installed under the sink, at the water entry point, to handle even the worst hard water supplies I encountered in some of the places I visited (especially remote national parks).
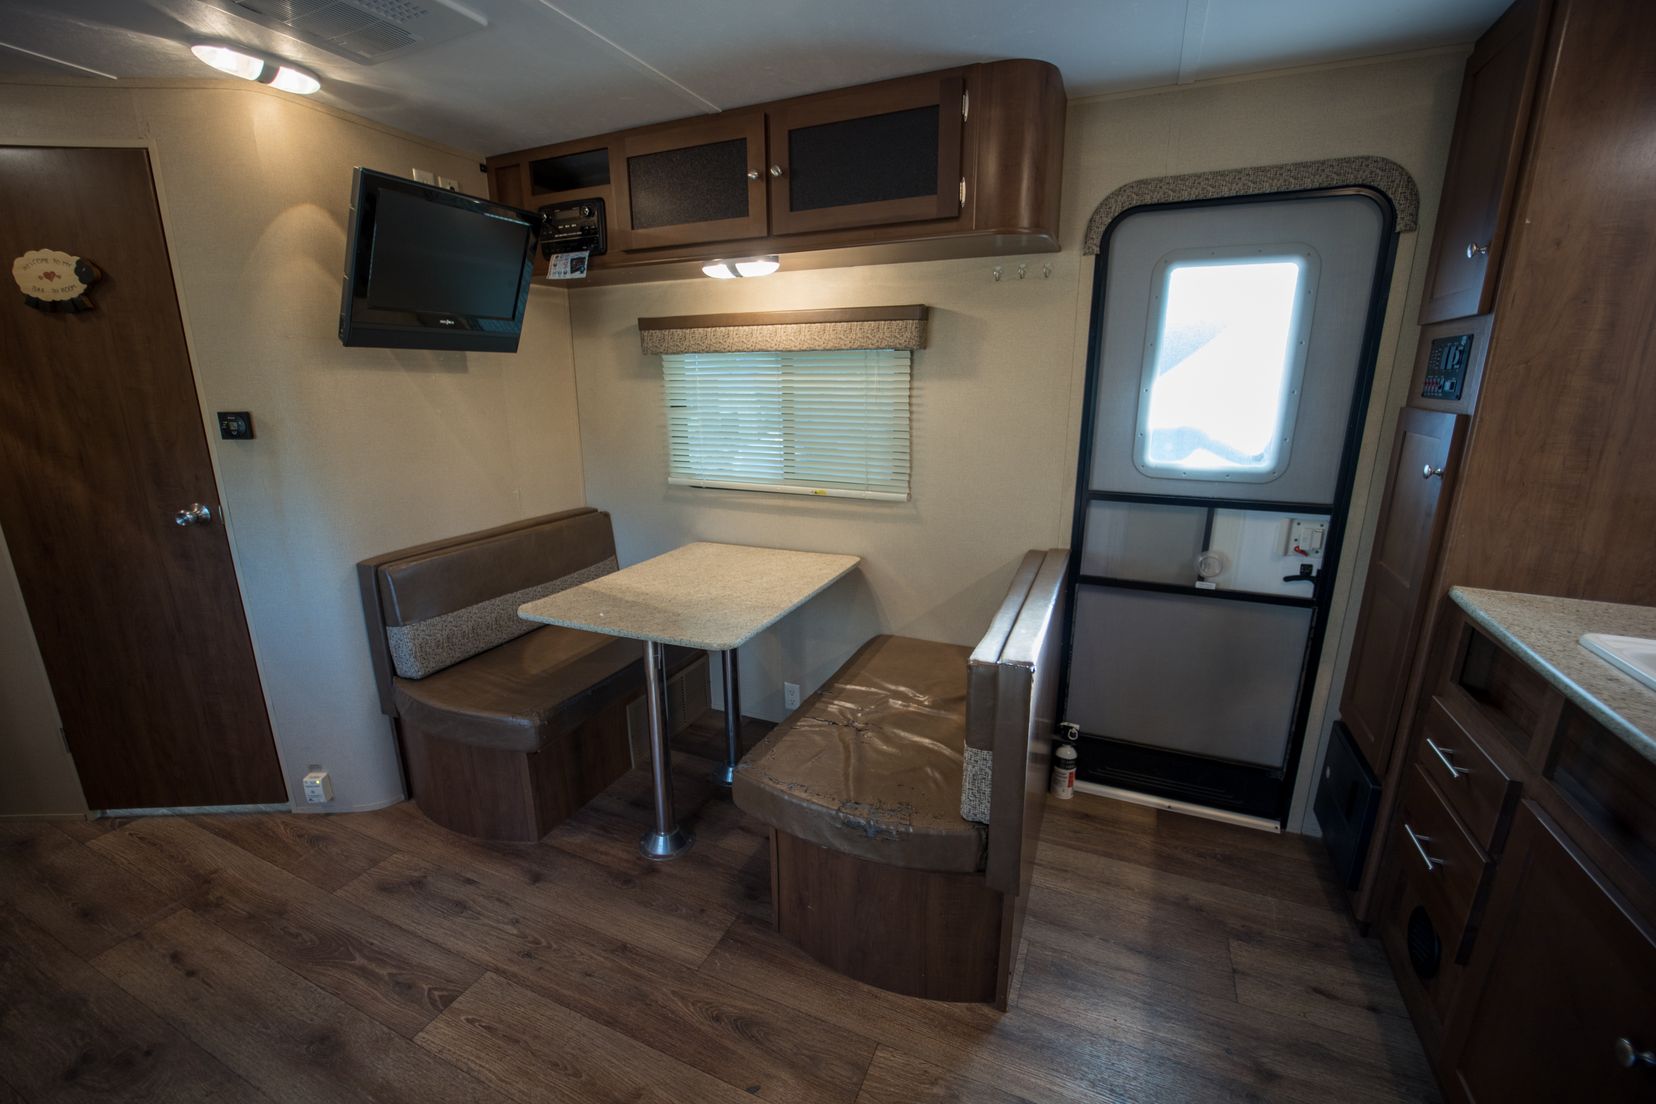
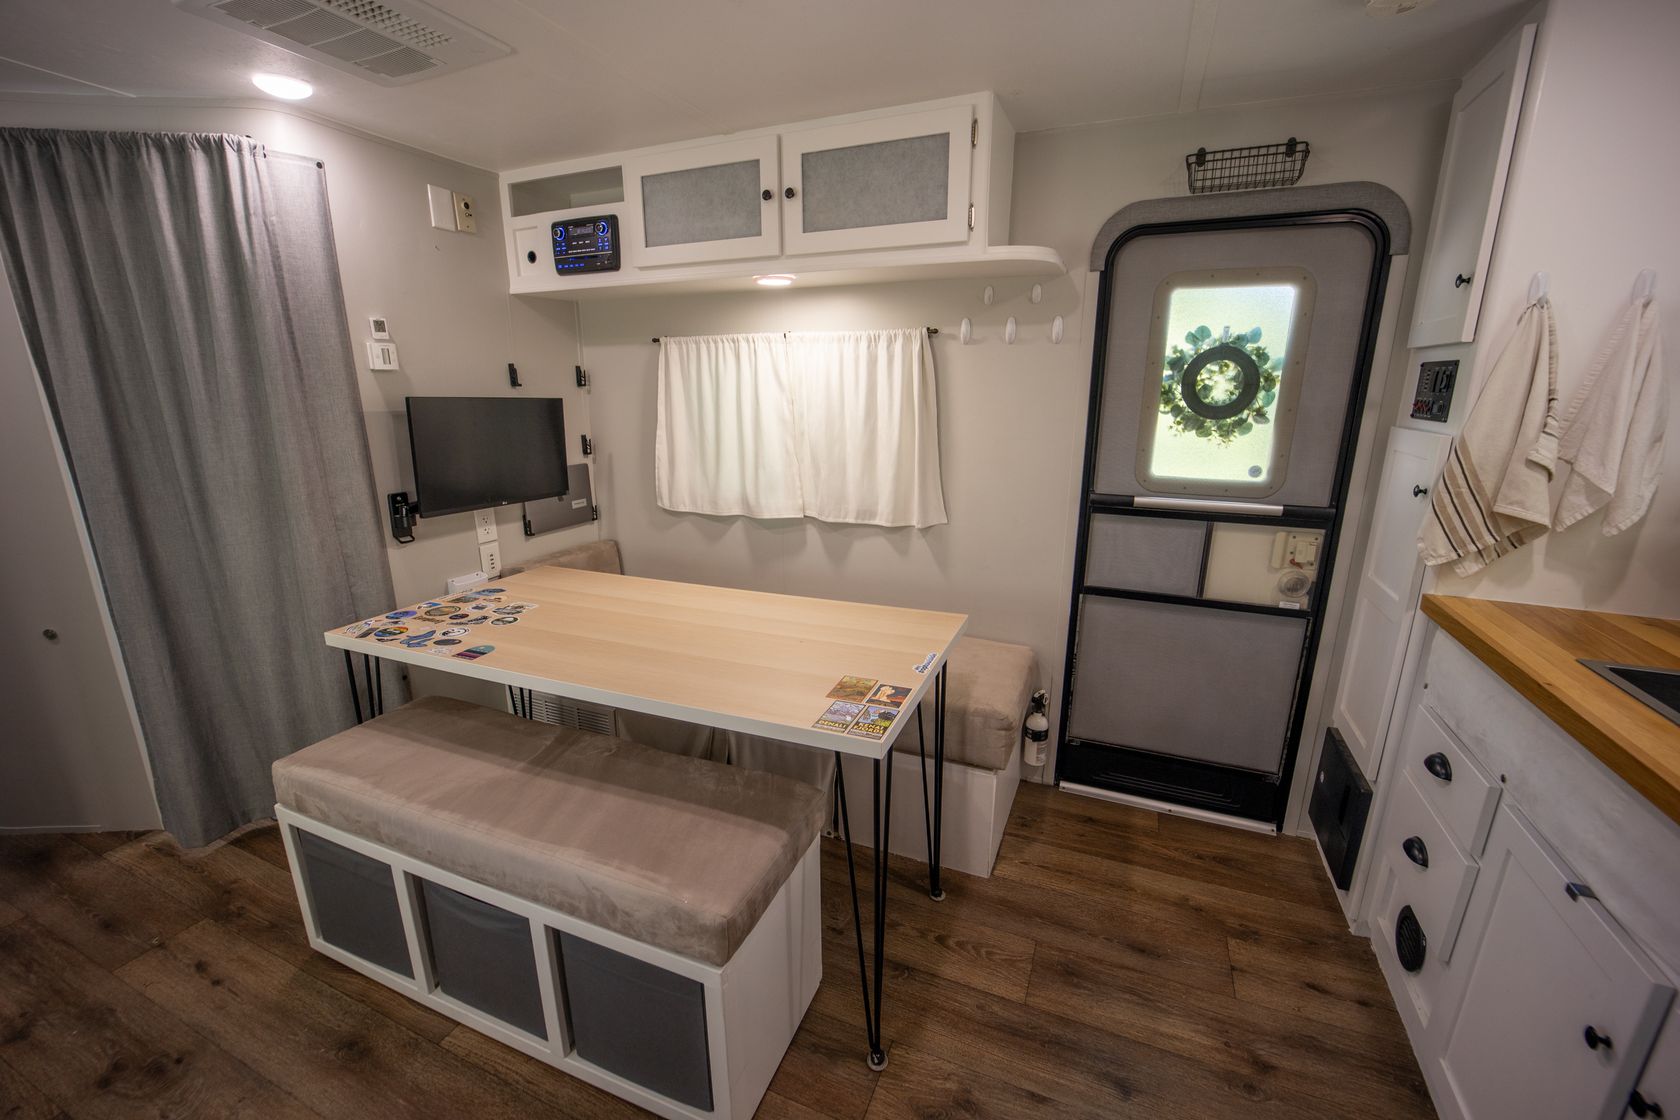
One of the first things I decided upon buying this tiny home, was that the dinette seating would NOT work. I love +1000 piece jigsaw puzzles and complex nerdy board games. So I pulled out the entire unit, building a bench seat along the wall (which holds the furnace, water pump, and some additional storage in the center). Then I built a custom bench seat for across the table, allowing 6 people to sit around this table for games and meals. The mobile bench seat has storage bins built-in as well!
On the wall, I removed the (mostly unusable) TV that came with the rig and installed a swing-arm mount to the wall (with in-wall reinforcements to hold it solid), and mounted an LCD computer monitor. This way the monitor can swing out from the wall and face either direction, allowing for a home-office space while seated at the table, or a small movie theater (just connect your computer to the sound system and the monitor and you’ve got a great movie setup). There are even laptop flush-mounts on the wall for convenient storage and a 4-socket USB outlet that runs on the 12-volt system – power for devices even when the RV isn’t plugged in.
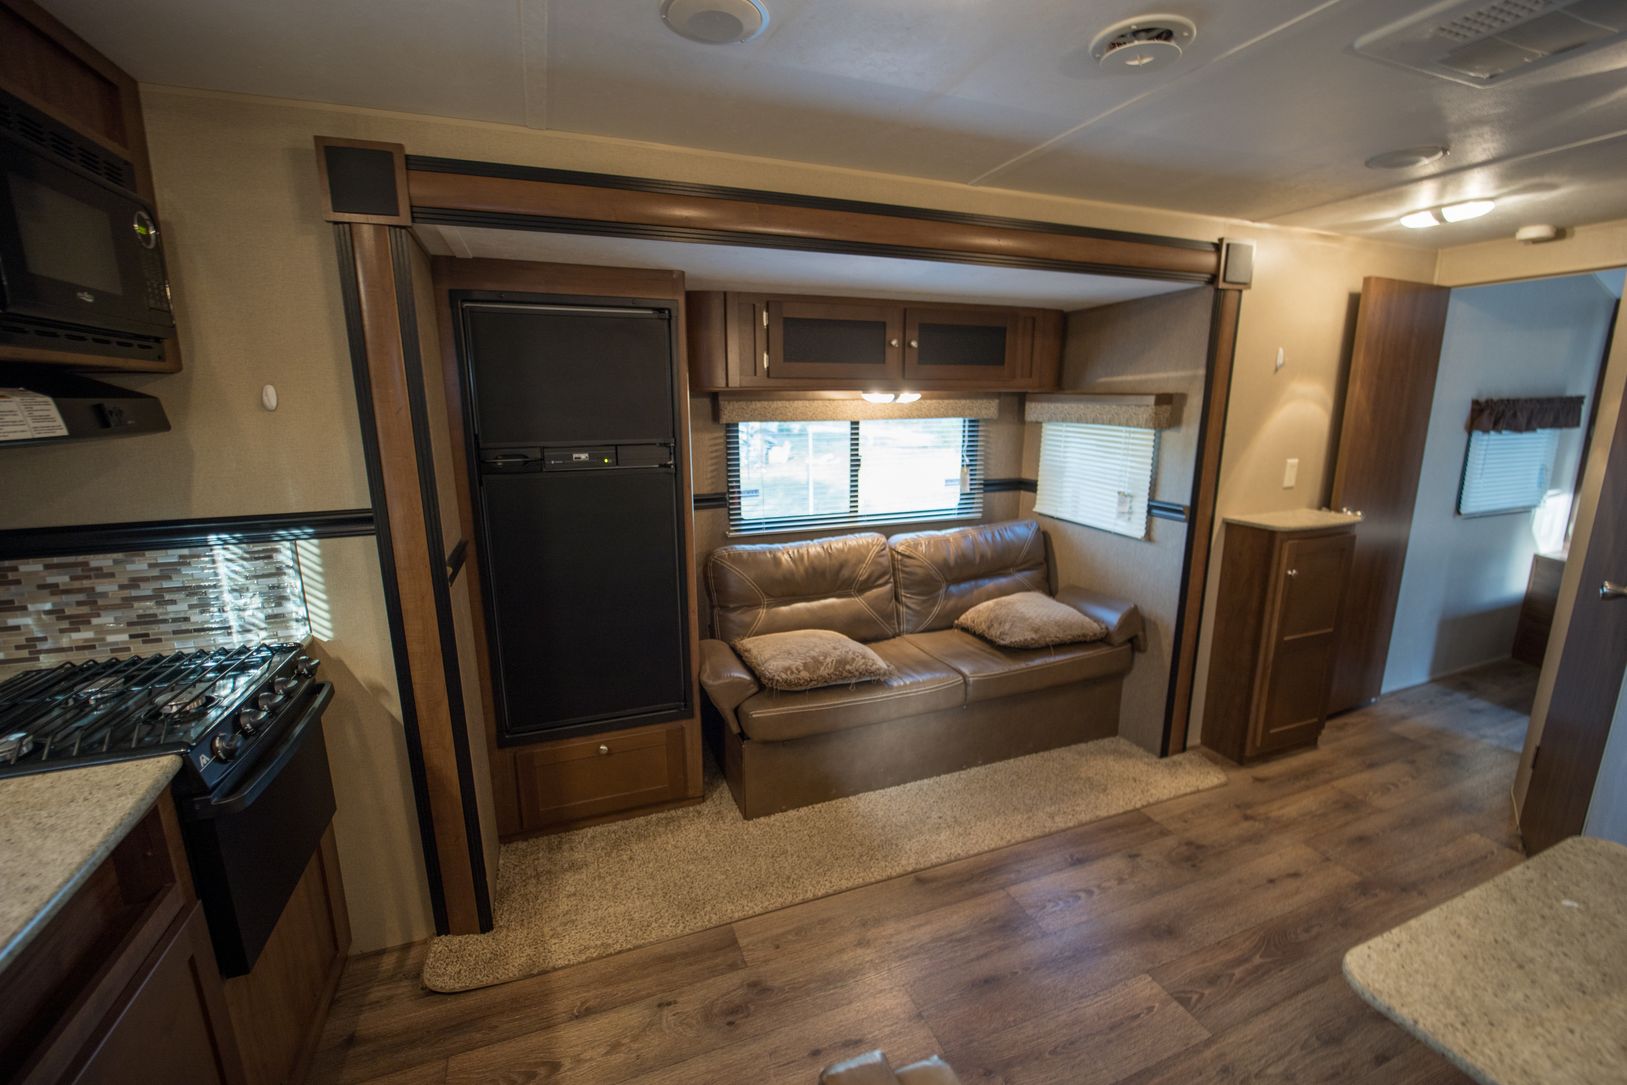
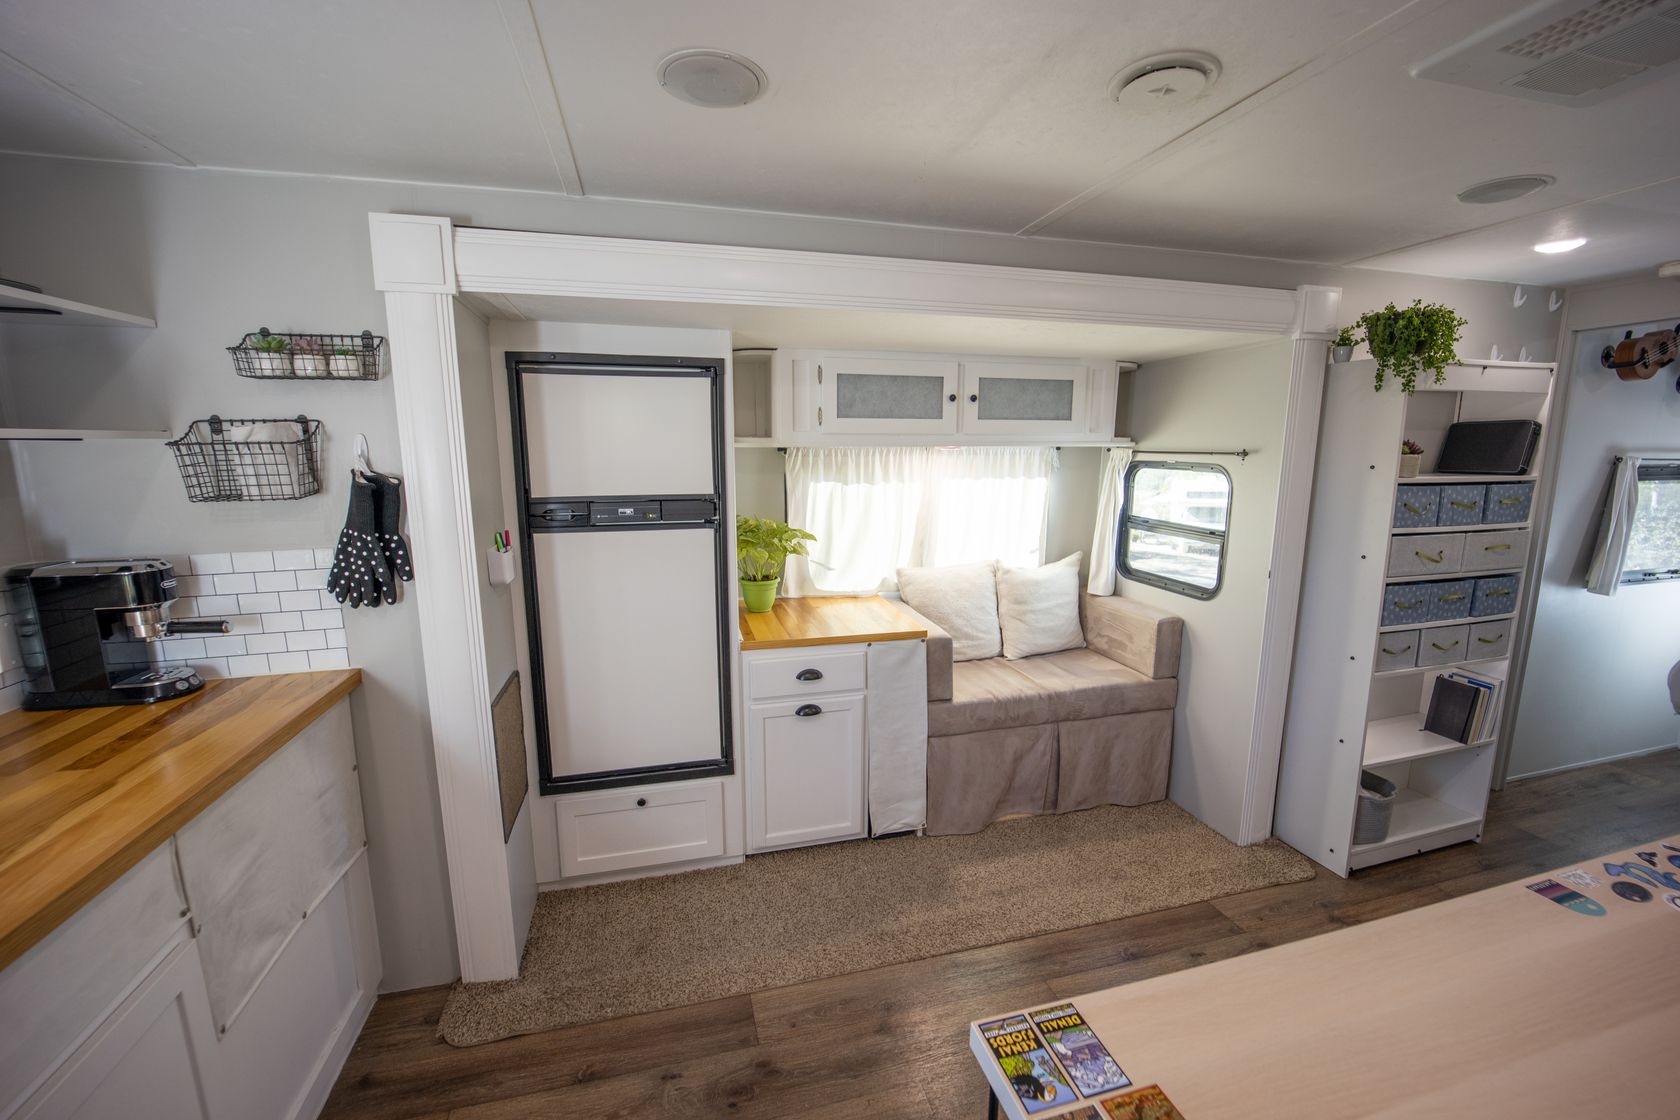
The fabric on the jack-knife sofa was disintegrating and the storage space underneath was almost impossible to access/use. So I pulled that out and built a cozy little window seat that is PERFECT for enjoying my morning coffee with a good book. I also removed the tiny “hutch” that was in the hallway, replacing it with a full-size bookshelf, adding a series of home-made drawers to the middle shelves for extra, organized storage space. There is ample, easy-access storage space beneath the window seat, as well as in the tall cubby space beside it!
Next to the fridge, I put in a sliding cabinet to hold the trash and recycling bins, keeping them from taking up precious floor space. And as an added bonus, I replaced the black plastic fridge panels with whiteboard panels, to leave notes or jot grocery lists and reminders there.
Bathroom
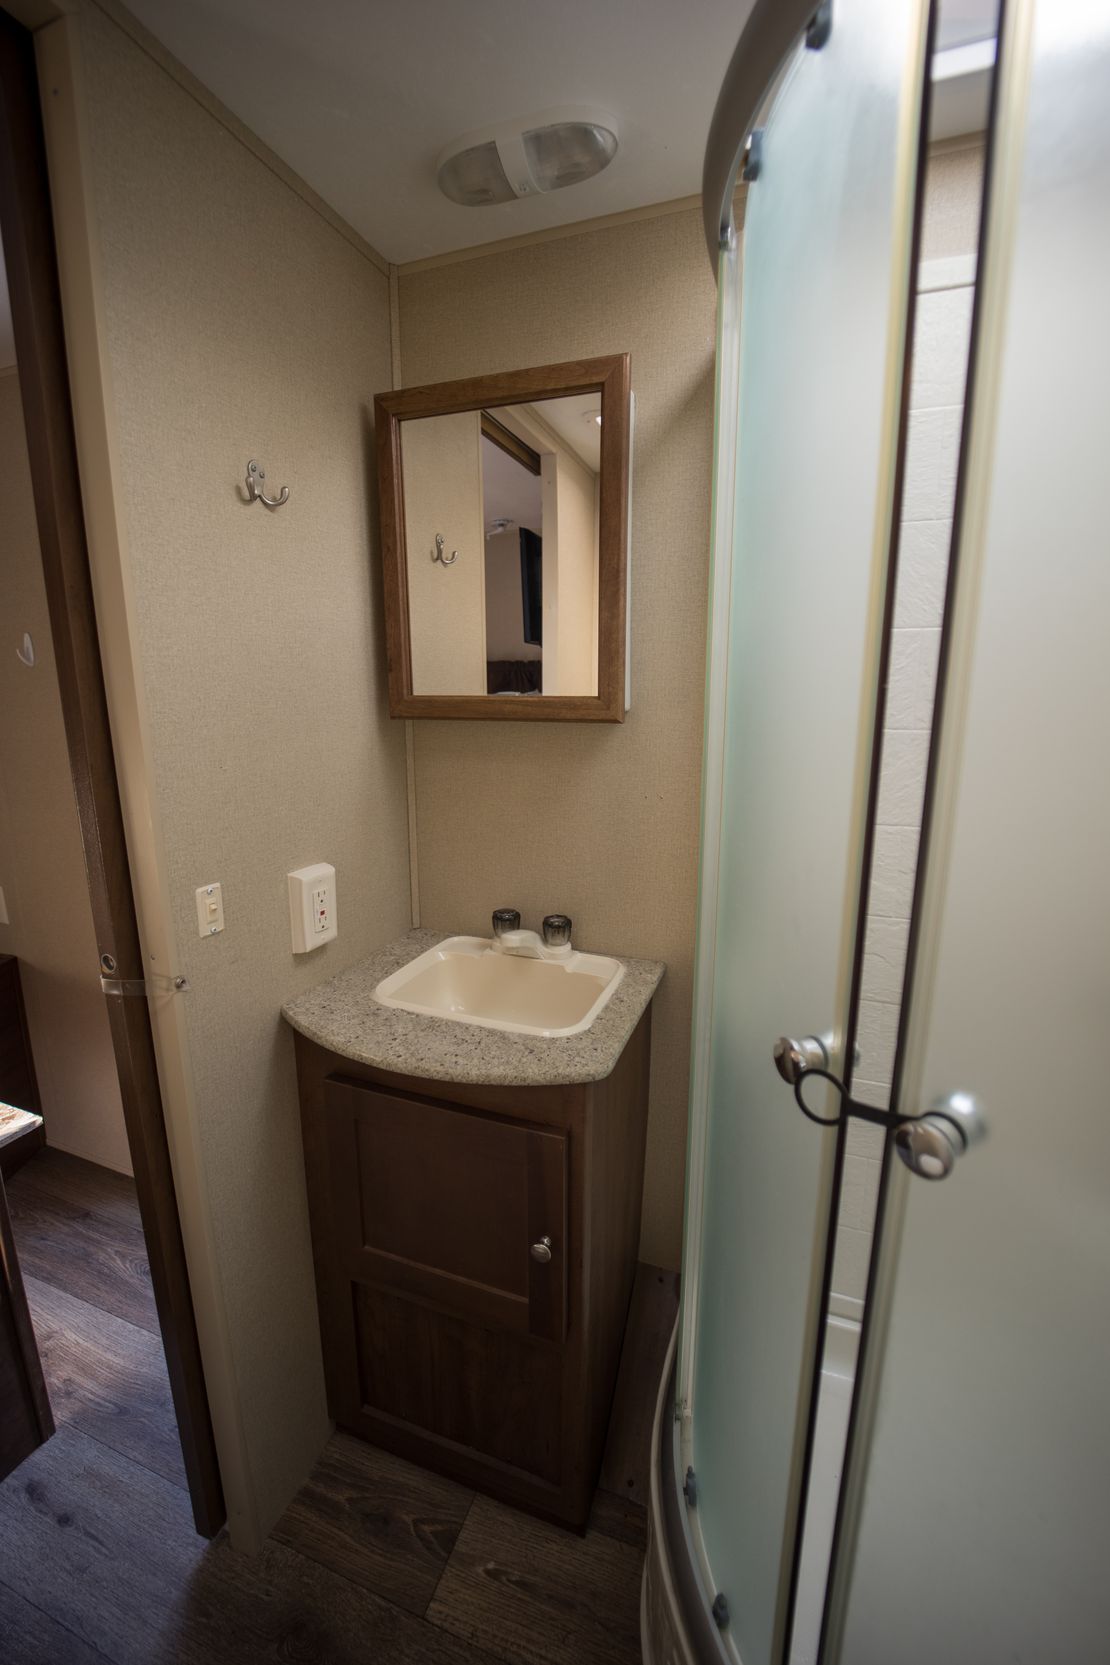
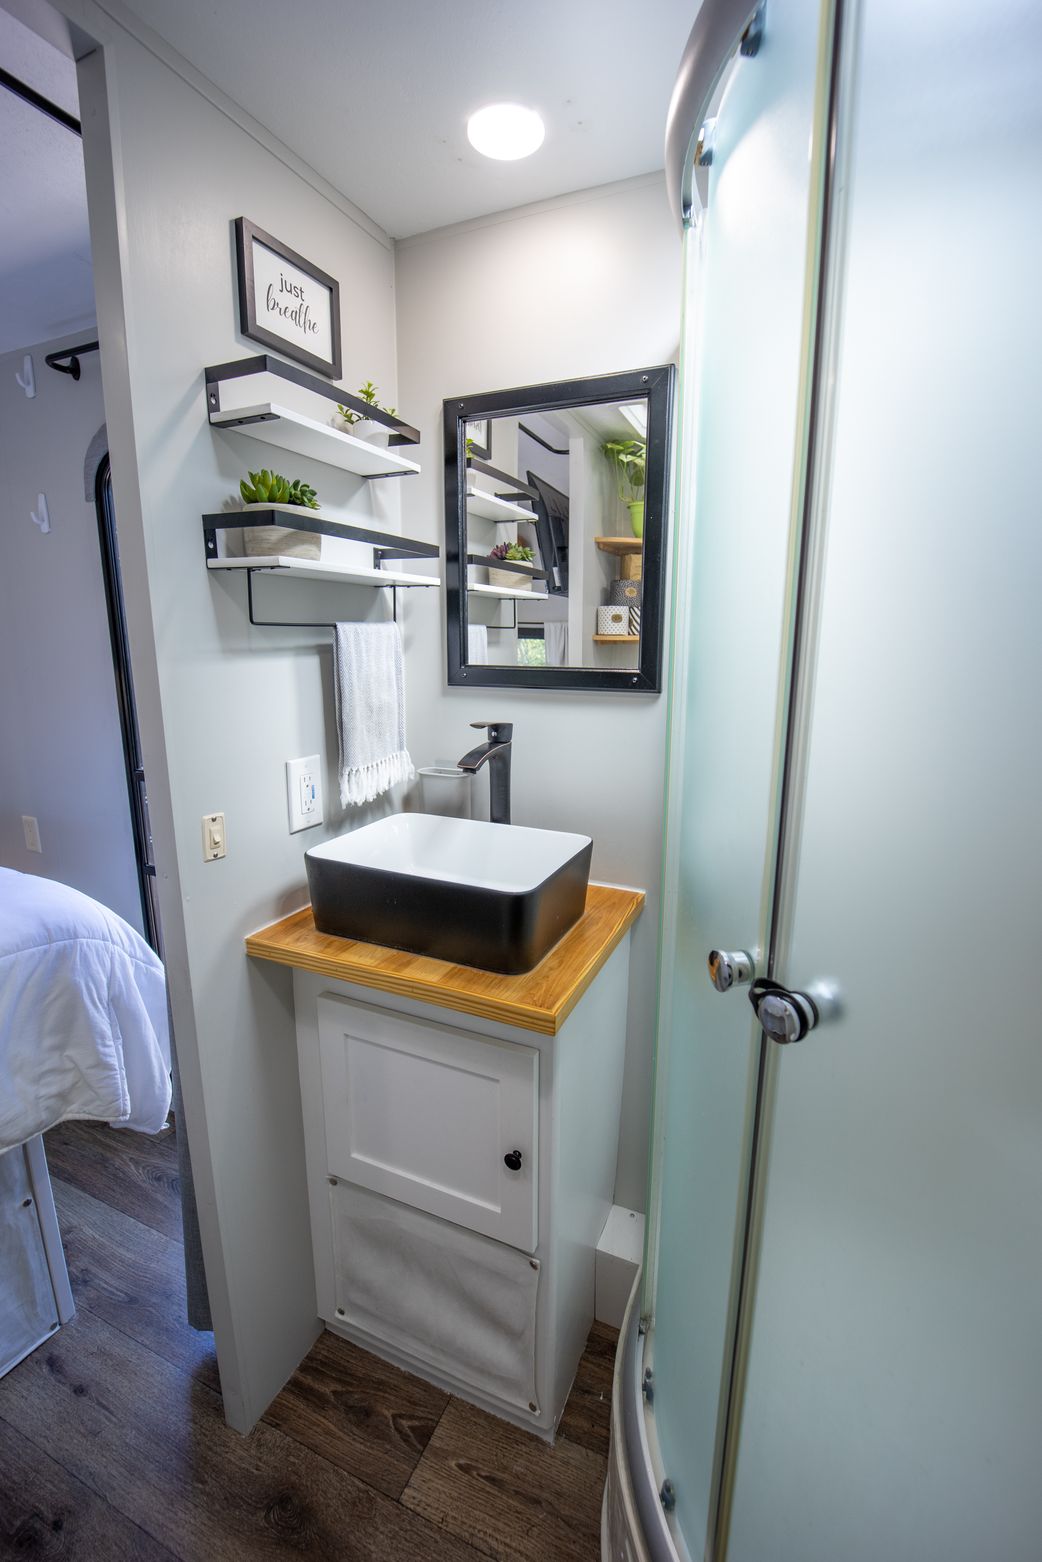
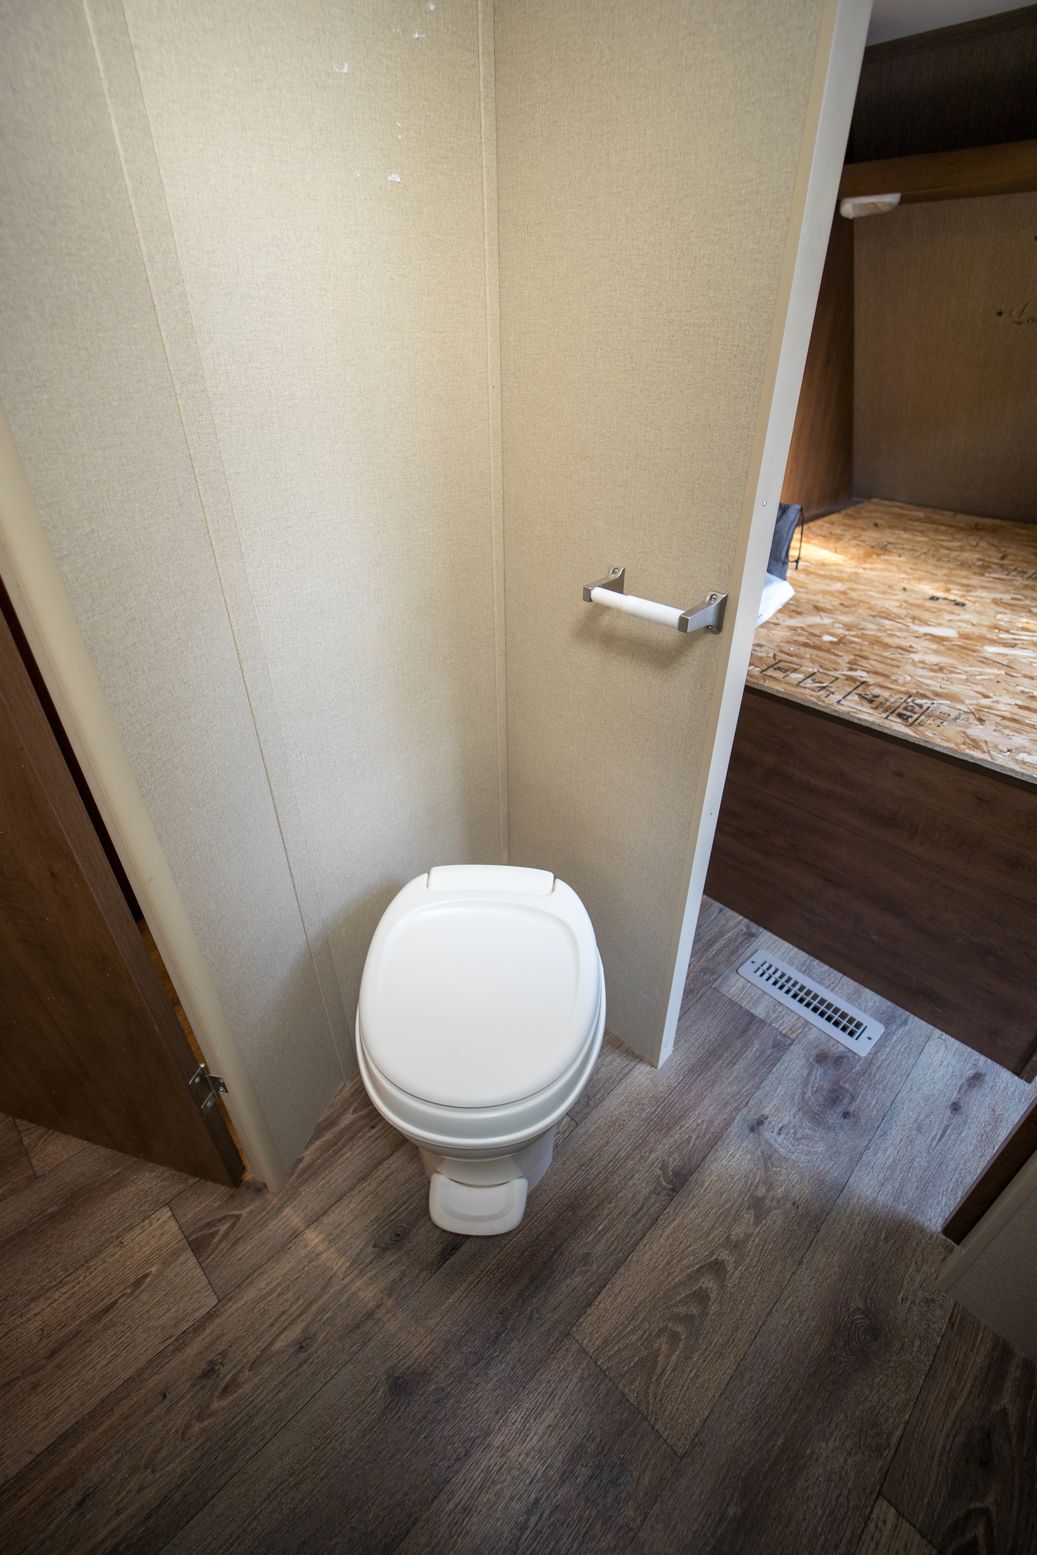
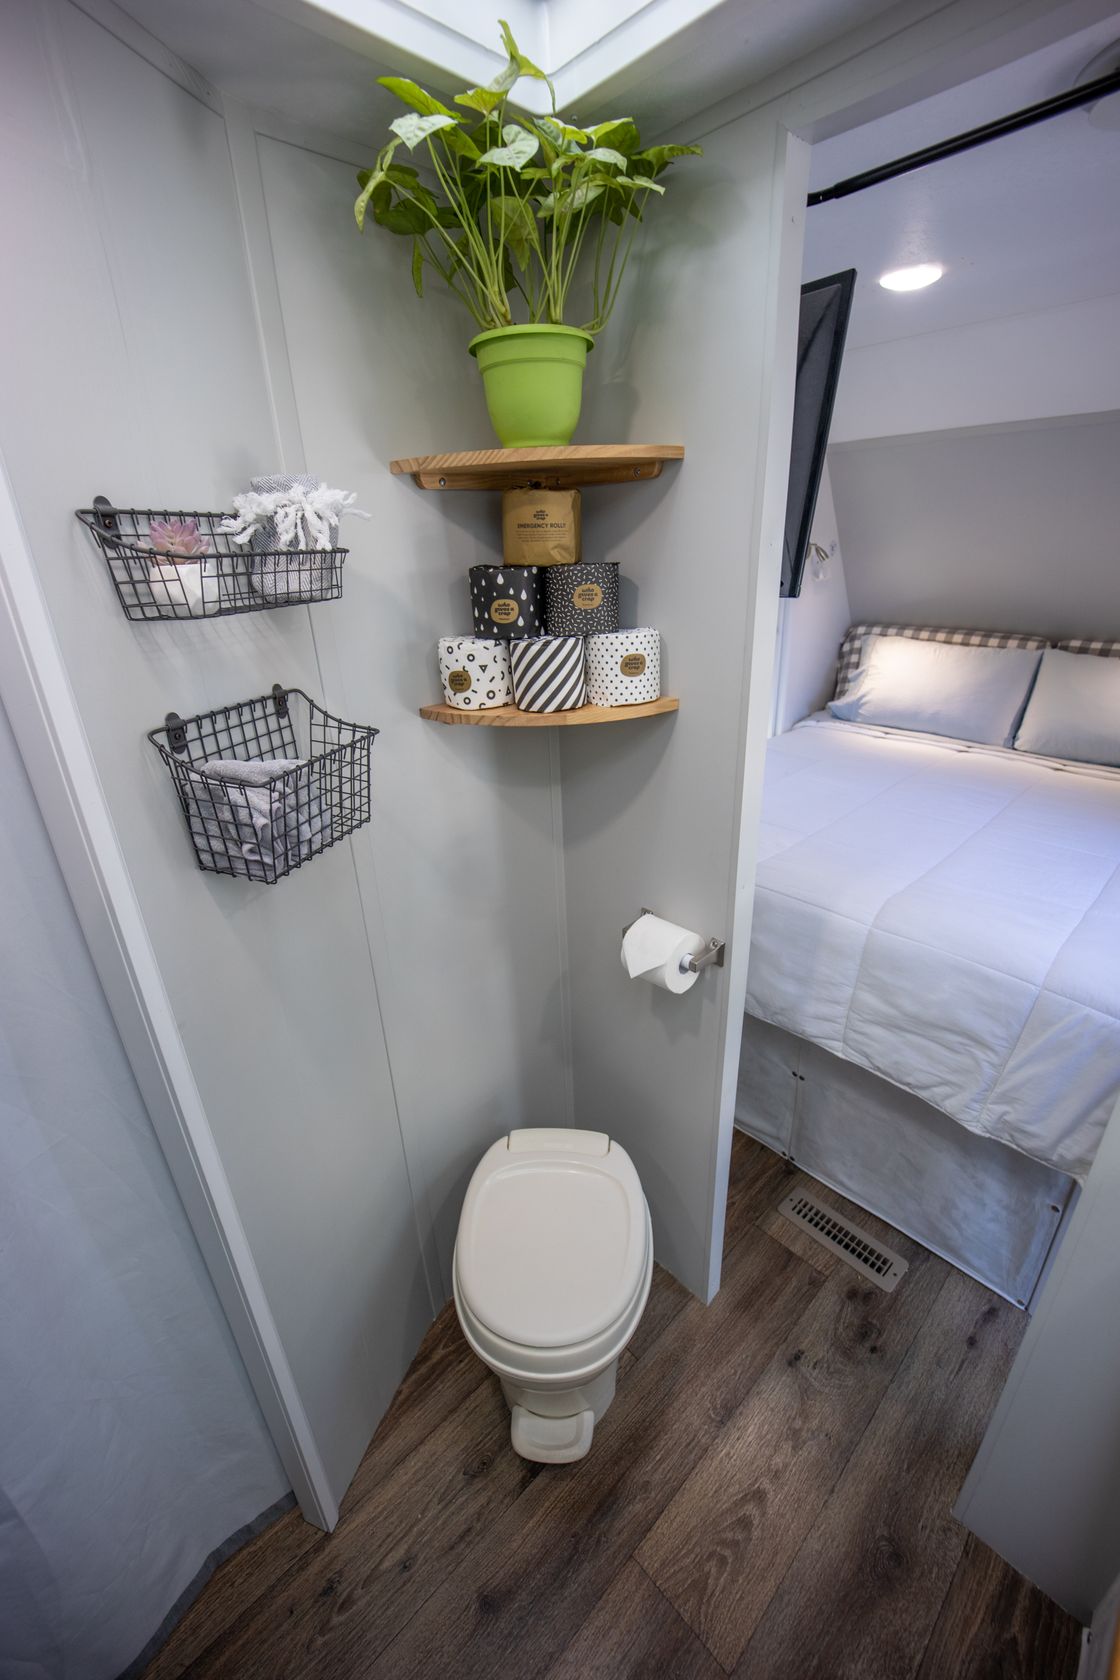
The bathroom got a complete makeover too. I installed the same hickory hardwood countertop, and installed a residential raised sink and faucet. This opened up so much storage space under the sink. I also replaced the medicine cabinet with some lovely shelves alongside the sink. I included some extra shelves and baskets along the wall near the toilet as well.
Even the shower got an upgraded, low-flow-high-pressure shower head that is mounted on a fully-adjustable slide-arm, making it much easier for people of all heights to get a reasonable shower in.
Bedroom
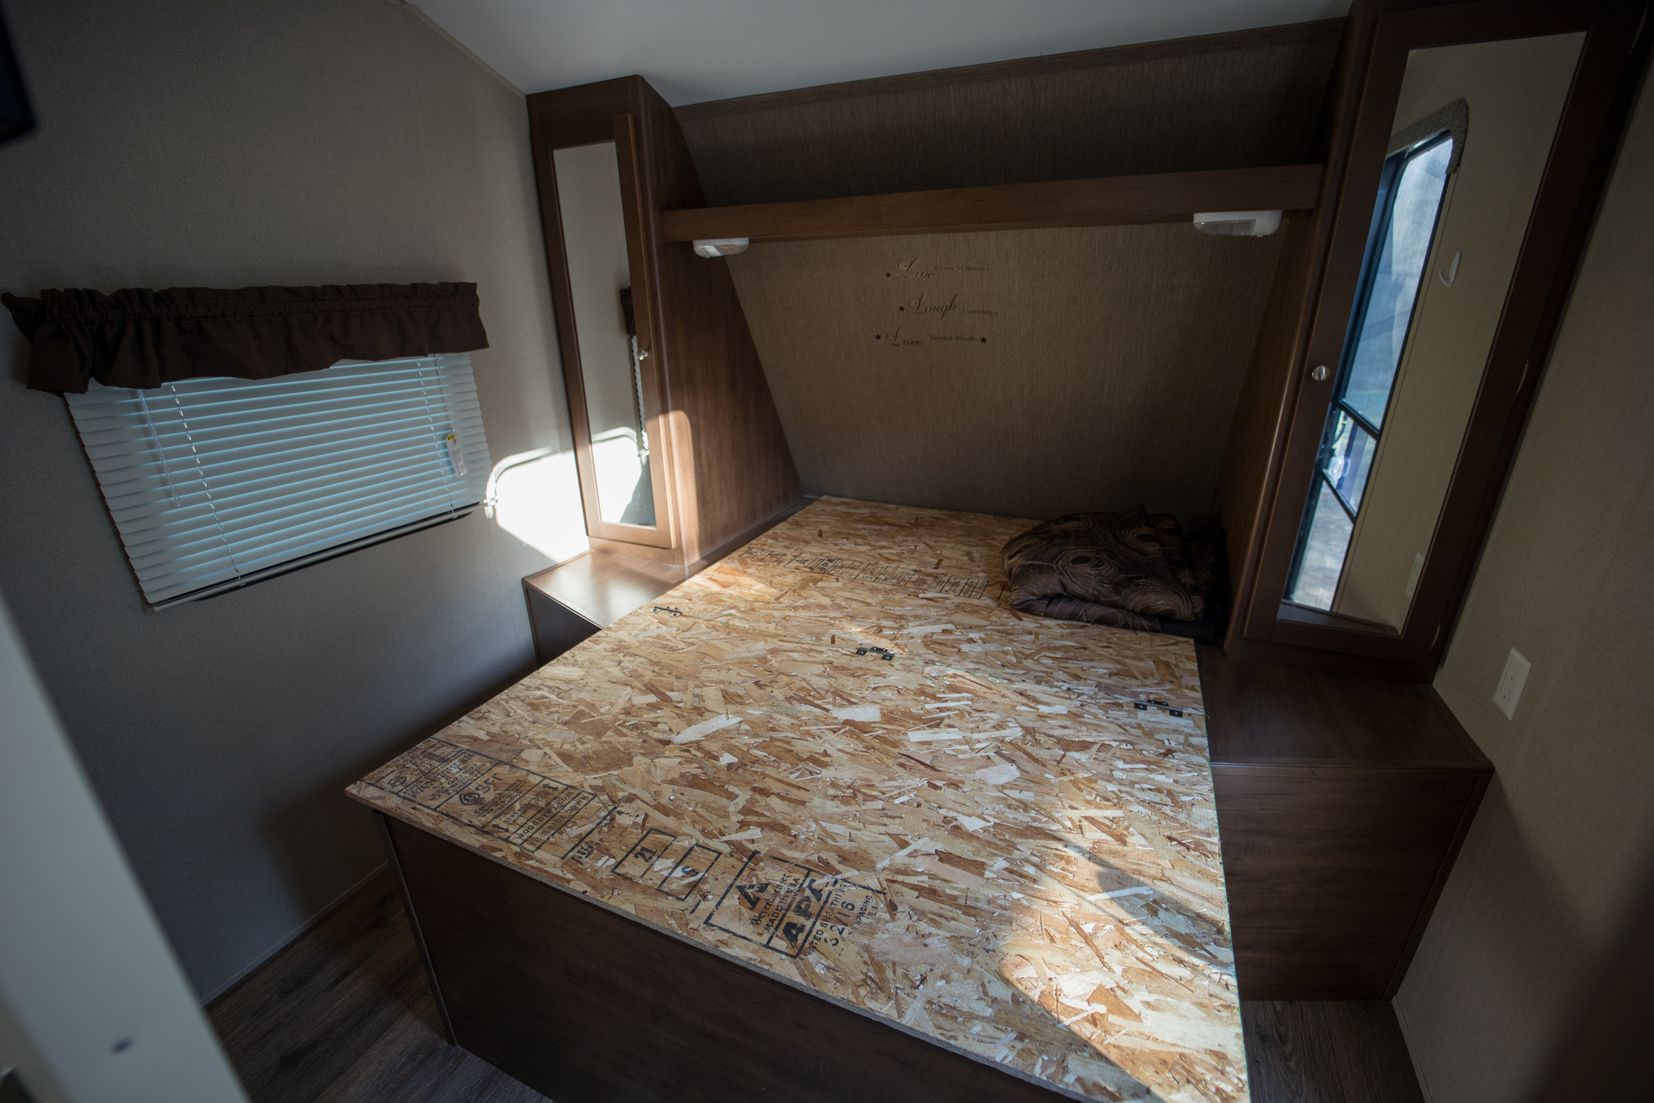
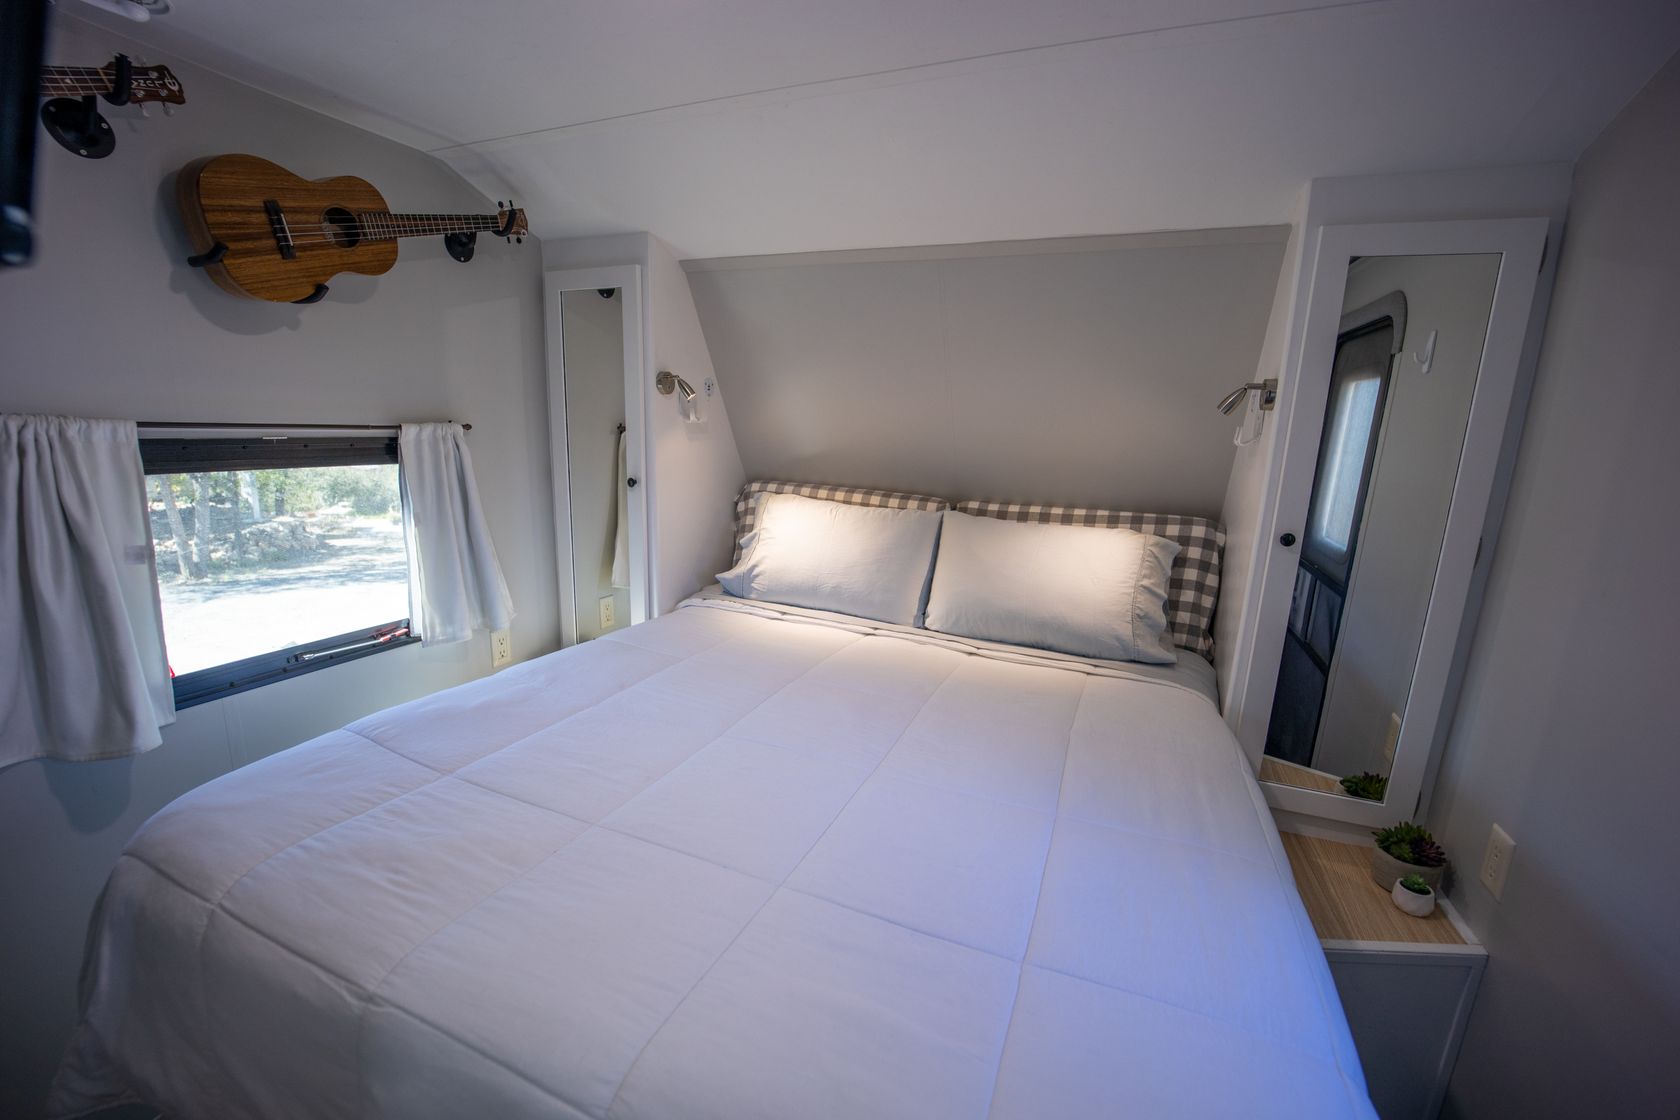
The bedroom needing brightening up too, so it got the full works of whites and neutral grays on all surfaces. I removed the tiny overhead shelf that wasn’t big enough to properly hold any items (not to mention the idea of a book falling on my face while I slept seemed a bad idea). The worst part was, if I tried to sit up in bed to watch a movie, I’d hit my head on the shelf. Ouch! I replaced the now-removed shelf lighting with a set of USB ports, cell phone holders, and stainless reading lights on both sides of the bed. The USB ports also run on the 12 volt system, for powered devices even when the RV isn’t plugged in!
What you can’t see in these photos is that I installed several shelves in both bedside closets to allow for MUCH more usable storage space.
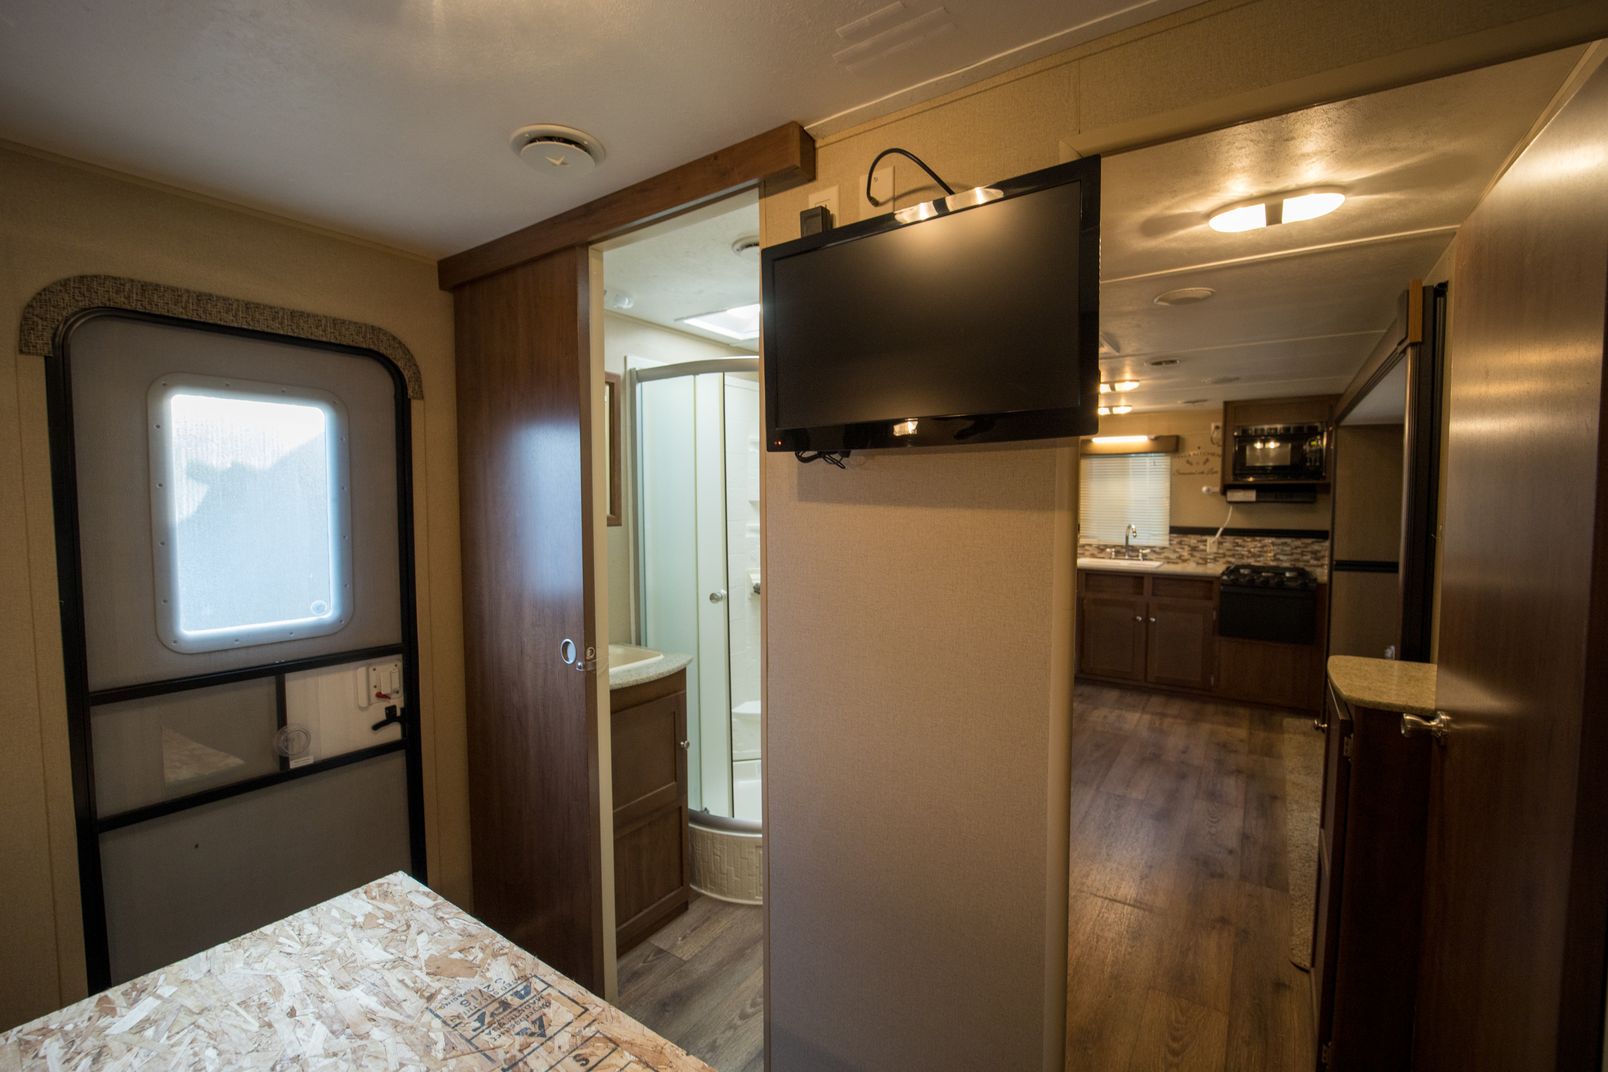
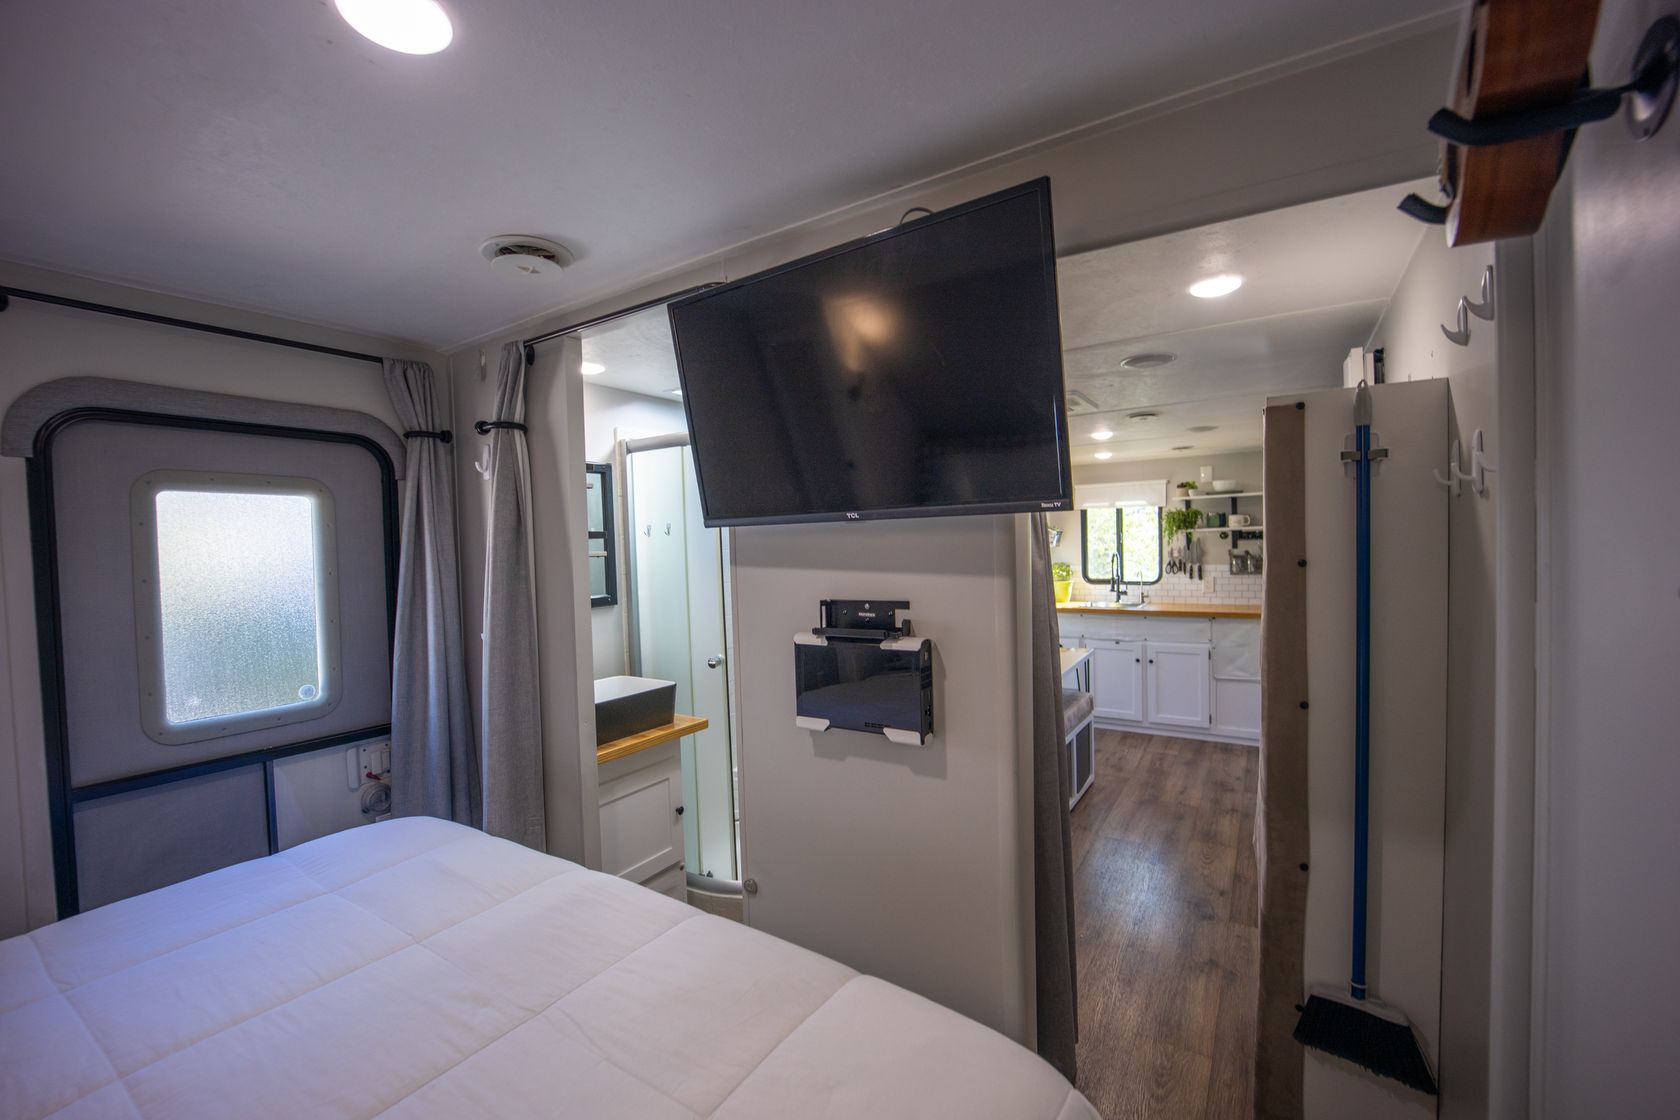
I also decided that I wanted the bedroom to be a space to wind-down, so I replaced the tiny TV (which had a VERY tinny-sounding speaker) with a larger, smart TV, so I could watch all my favorite stream-able shows. I was able to easily mount a few of my favorite video game systems on the wall below the TV with no issue as well.
You’ll notice that throughout the house, the three inside doors (between the bedroom and bathroom) were all removed, as they were incredibly cumbersome and blocked the much needed airflow and light throughout the living space. In their place, I installed neutral, light-blocking curtains with magnets to hold them shut when you needed privacy (such as in the loo).